You've spent hours producing a useful YouTube video, then share its URL on Instagram and watch it disappear into a caption or comment. The link may be technically correct, but Instagram users are scrolling through a video-first feed, not browsing a list of external destinations.
The practical answer isn't to re-upload every full video. It's to match the sharing method to the job. Use a direct link when convenience matters, a Story link sticker when you need clicks, a Reel when you want discovery, and a DM when you're speaking to someone who already has a reason to watch.
Why You Cannot Just Drop a YouTube Link on Instagram
Instagram doesn't support native embedding of YouTube videos inside regular posts. A pasted URL won't turn an Instagram caption into a playable YouTube window, so viewers must leave the post and open the destination themselves. The platform's design pushes creators toward native media, while YouTube is built around the original watch page.
That creates a familiar failure pattern. A creator publishes a detailed tutorial on YouTube, copies the URL into an Instagram caption, and expects the existing audience to click. Instead, the post looks like a promotion rather than content, and the viewer has no immediate reason to interrupt their scroll.
The platforms still matter for different reasons. YouTube reached 84% of U.S. adults in 2025, while Instagram reached substantially fewer adults in the same Pew Research fact sheet, which helps explain why creators use Instagram to introduce people to longer YouTube content. Globally, Instagram represented 6.89% of social-media market share in August 2026, compared with YouTube's 8.22%, according to StatCounter's global social-media market data. Both are major discovery channels, but they reward different packaging.
Choose the destination based on intent
You have four useful paths:
- Bio link: Use it as a persistent home for the latest video, a playlist, or your channel.
- Stories link sticker: Choose this when the immediate objective is sending people to a specific YouTube watch page.
- Reel or feed upload: Select a short, edited clip when you want Instagram-native discovery and engagement.
- Instagram DM: Send the URL with personal context when a follower has asked a relevant question or shown clear interest.
A link-only post is fast, but it asks Instagram users to do more work before they receive value. A native teaser gives them a reason to care first, then directs interested viewers to the full video.
Practical rule: Use links for traffic and native clips for attention. Don't ask one format to perform the other format's job.
Instagram's video environment makes that distinction important. The Instagram sharing workflow documented by SocialRails notes that average Instagram posts in 2025 generated 39.96 shares and 17 saves, making a repackaged, useful clip more suited to platform engagement than a bare external URL. The rest of this guide shows how to choose the least risky method, prepare the asset, and turn a YouTube video into an Instagram-ready teaser without treating duplication as the strategy.
What to Prepare Before You Share Any YouTube Video
Before opening Instagram, decide whether you're sharing a link or publishing a new file. That single decision determines the rights checks, editing work, and technical preparation you'll need.
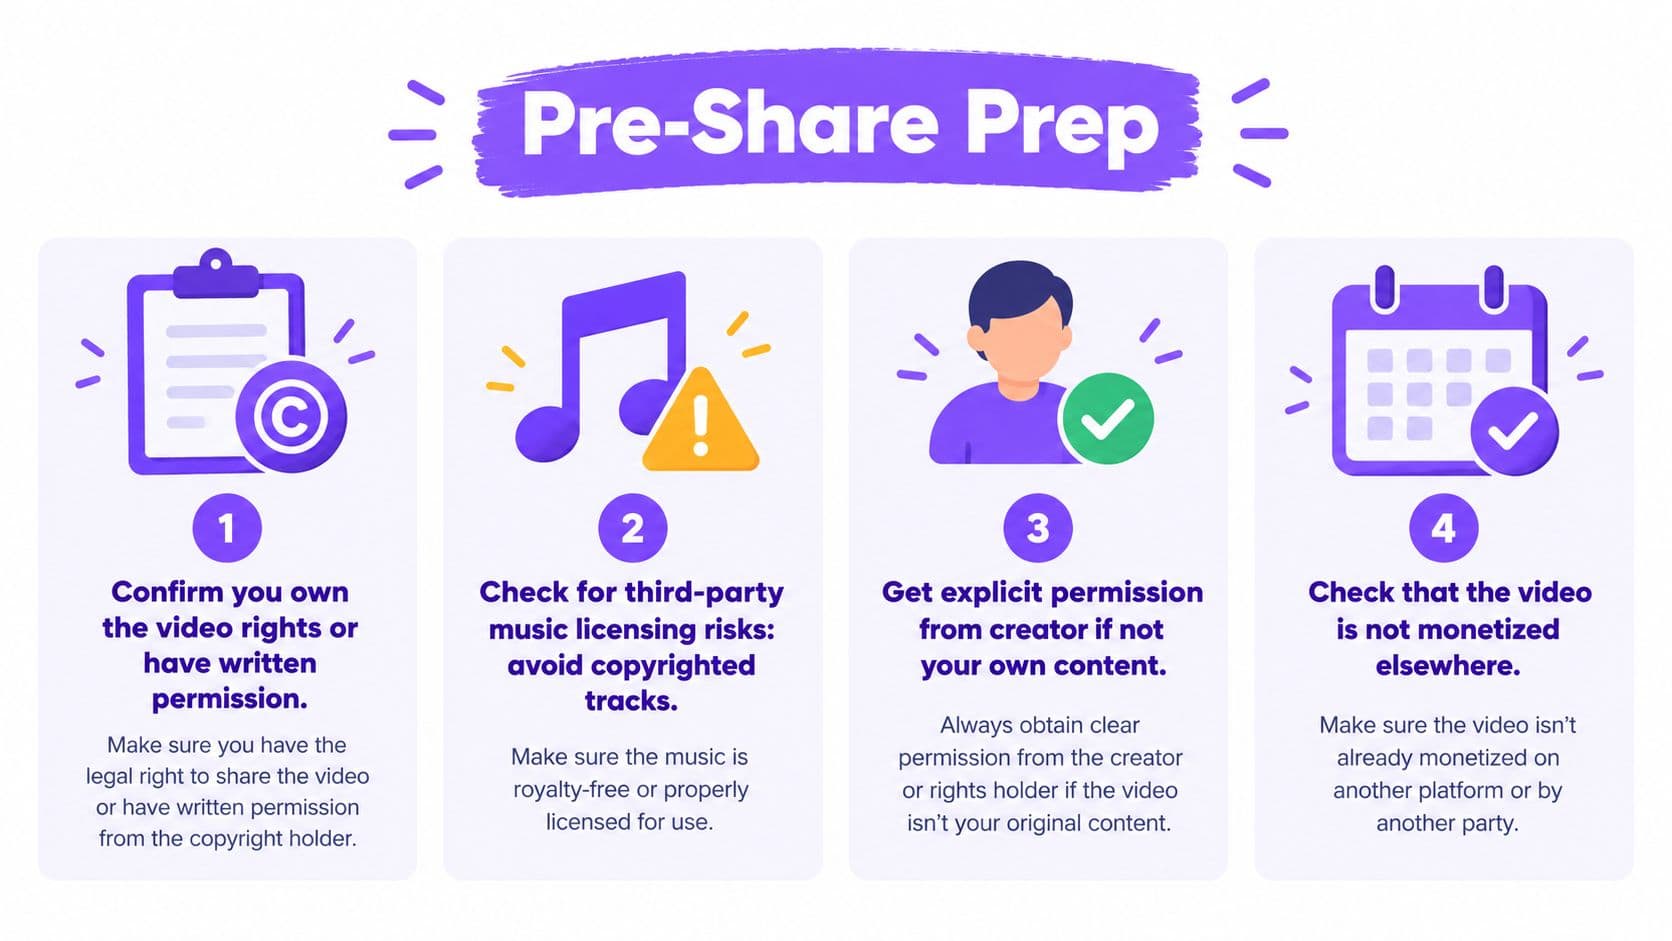
Start with ownership. If you created the YouTube video and still control the original project or master export, work from that file instead of downloading a compressed copy from YouTube. If the video belongs to another creator, get explicit permission before uploading any clip. A public YouTube URL gives people access to watch the video, but it doesn't automatically give them permission to rehost it on Instagram.
Music needs its own check. A track that was cleared for YouTube may not be cleared for Instagram, especially if the license covers only one platform, one territory, or one use case. If you're unsure, remove the questionable track and replace it with audio you're licensed to use, or use an Instagram-native audio option where appropriate.
Make the clip native before you upload
A YouTube video typically arrives in a horizontal format. Instagram Reels and Stories favor a full-screen vertical presentation, so a raw horizontal upload can produce awkward cropping, empty space, or text hidden behind interface controls.
Prepare these assets before publishing:
- A standalone moment: Choose a section that makes sense without the entire YouTube introduction. One clear insight, reveal, demonstration, or problem-solution beat is easier to understand than a random excerpt.
- A new opening hook: The first spoken line may work on YouTube because the title and thumbnail already established context. On Instagram, the video must establish that context immediately.
- Readable captions: Many viewers encounter Instagram video without relying on sound. Burned-in captions give the clip a dependable text layer, but keep them away from faces, product details, and interface-heavy areas.
- A cover frame: Select a frame that communicates the subject at a glance. If you add cover text, preview it both in the Reel view and on your profile grid.
- A destination: Decide whether the call to action points to a Story sticker, the bio, or a direct YouTube URL. “Watch the full tutorial” is stronger when the viewer knows exactly where that tutorial is.
You can also turn a longer source into a purpose-built clip with a URL-to-video workflow from Hooked, then review every cut manually before publishing. Automation can speed up selection and formatting, but it won't know whether a joke depends on earlier context, whether a claim needs qualification, or whether the music is licensed for your intended use.
Separate technical permission from commercial safety
A video may upload successfully and still create a rights problem later. Re-uploading downloaded content can raise ownership, attribution, music-licensing, and takedown risks, particularly when you don't control the original production.
If you're promoting someone else's video, the safer route is usually a Story link, bio link, or DM. That sends viewers to the original YouTube asset without creating a second hosted copy. If you do have permission to publish a clip, keep a record of that permission and credit the creator where the agreement requires it.
Four Proven Ways to Share a YouTube Video on Instagram
The right method depends on whether you want immediate traffic, public discovery, ongoing access, or a personal recommendation. Instagram supports each route differently, so don't copy the same URL into every surface and expect the same outcome.
Put the YouTube URL in your bio
Your bio link works as a stable destination for people who discover you through multiple posts. Open your Instagram profile, edit the profile links, and add the YouTube video, playlist, or channel URL. If you use a link-in-bio hub, place the current video where visitors can see it without searching.
Use this method for a launch that will be promoted across several posts, or when you want your audience to find the same video after a Story expires. Keep the instruction simple in captions and Reel overlays, such as “Full walkthrough in the bio.”
A hub is useful when you have several destinations, but too many choices can weaken the next action. Put the most relevant YouTube destination first and label it according to the viewer's benefit, not the internal file name.
Use a Stories link sticker
Stories are the cleanest option when you want a clickable YouTube destination without uploading the video again. Copy the YouTube URL, create a Story, open the sticker tray, select the link sticker, paste the URL, and customize the sticker text so it tells people what they'll get.
A thumbnail, short teaser, or text card can provide the context. The sticker should sit where people can tap it comfortably, while the surrounding copy answers three questions: what is the video, why should someone watch, and what should they do next?
For a tutorial, “Watch the full step-by-step” is more useful than a vague “Tap here.” If the Story needs to remain accessible, save it to a clearly named Highlight after publishing.
Upload an edited Reel or feed video
A Reel is the reach-oriented route. Export a short clip from footage you own or have permission to use, adapt the composition for vertical viewing, add captions, choose a strong cover, and publish it as an Instagram-native piece.
The Reel should deliver enough value to stand alone. The YouTube video becomes the next step for viewers who want the complete explanation, additional examples, or the longer demonstration. Put the destination in your bio or direct viewers to a Story link rather than relying on a caption URL to be clickable.
A feed video can make sense when the clip supports your profile's visual library or existing followers. It's less useful as a substitute for a full YouTube upload, because the two platforms serve different viewing habits.
Send the link in a DM
DMs work best when the recommendation has context. Reply to a question with the exact video that answers it, add the relevant timestamp if useful, and explain why you're sending it. A personal sentence can turn an external link into a helpful response instead of a broadcast.
Avoid sending the same URL to people who haven't shown interest. The recipient should understand the connection between their question or situation and the video you're recommending.
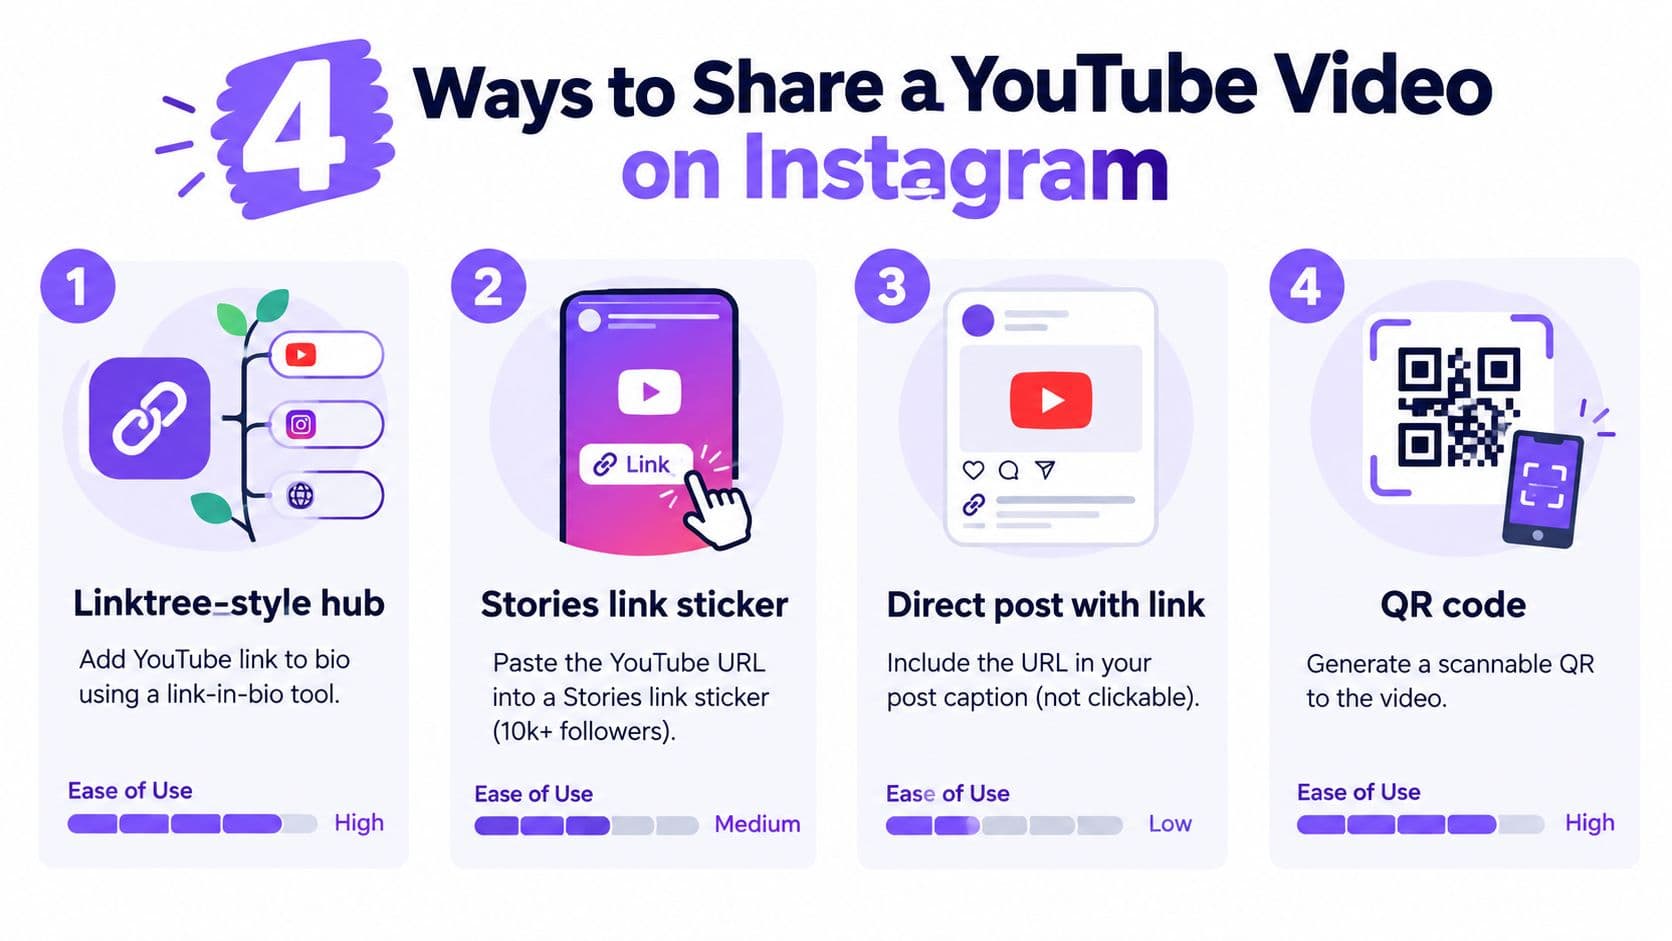
| Method | Best For | Effort Level | Reach Potential |
|---|---|---|---|
| Bio link | Ongoing access to a video, playlist, or channel | Low | Moderate |
| Stories link sticker | Direct clicks to a specific YouTube video | Low | Audience-dependent |
| Reel upload | Instagram discovery and native engagement | Medium | High potential |
| DM | Personal recommendations and warm conversations | Low | Targeted |
For creators producing clips regularly, an Instagram Reels generator workflow from Hooked can help turn a longer source into a formatted draft with captions and a platform-specific structure. Treat the output as an edit starting point, not as a reason to publish every detected moment.
The best practical combination is often a Reel for discovery, followed by a Story sticker for the full-video click. That gives Instagram users native content first while preserving a clear path to YouTube.
How to Turn Your YouTube Video Into an Instagram Ready Reel
Start with the moment that creates curiosity, not the moment that explains everything. A strong Reel excerpt usually contains one idea, one tension point, or one visible result. If the viewer needs several minutes of setup before the clip makes sense, rewrite the opening or choose another section.
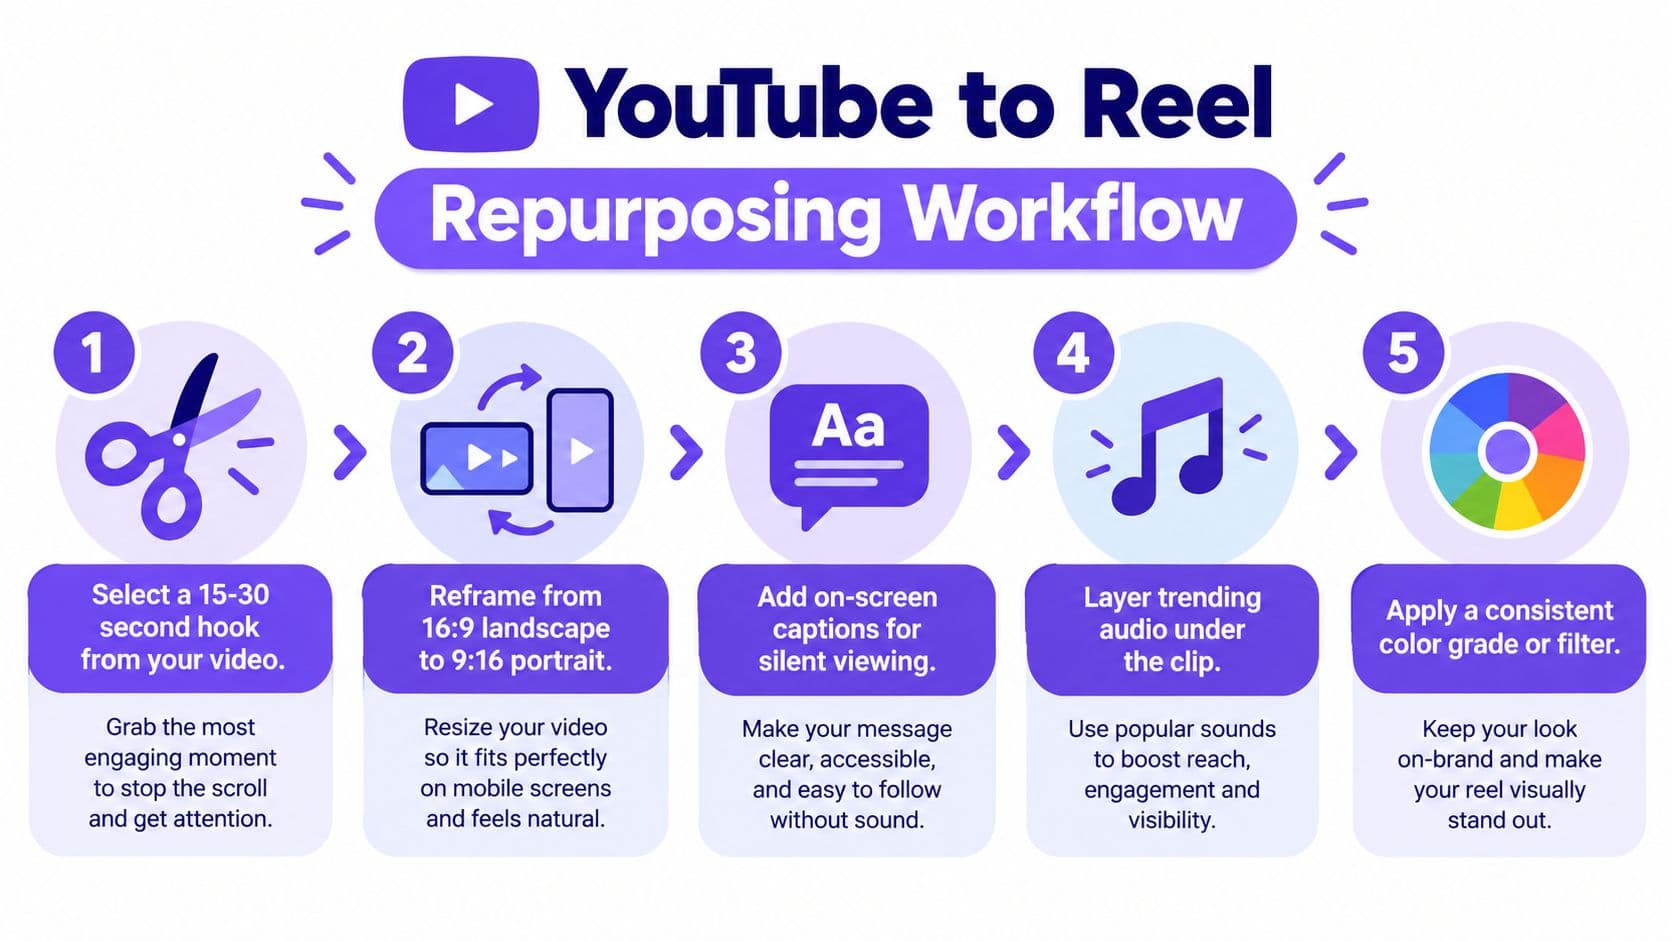
A useful editing sequence looks like this:
- Select a short hook. The mandatory workflow graphic uses a 15 to 30 second hook as its starting range. Choose the shortest version that delivers a complete promise, and remove greetings, pauses, repeated points, and slow transitions.
- Reframe the composition. Move from the YouTube frame to a 9:16 vertical layout. Use a tracked crop for a moving speaker, a centered crop for a stable subject, or a split layout when both a face and screen content matter.
- Add captions. Use short lines with enough contrast to read on a phone. Keep critical text away from the top and bottom interface areas.
- Refresh the sound carefully. If the original music isn't cleared for Instagram, replace it. When adding platform audio, confirm that it fits the rights situation and doesn't bury speech.
- Apply consistent visual treatment. A repeatable typeface, color treatment, or caption style helps the clip feel like part of your Instagram presence rather than an unedited export.
Use the right export settings
For a reliable Reel export, target 1080×1920 pixels, a 9:16 vertical frame, and an MP4 with H.264 video or MOV file. The Instagram Reels specification guidance from VidUlK recommends 30 fps and notes that audio is typically kept as AAC at 48 kHz. The same guidance indicates that accepted Reel files can extend up to 4 GB, although a smaller, clean export is usually easier to handle.
Export from the highest-quality source you own. Don't screen-record the YouTube player, download a social-platform copy, and then export it again. Each additional compression step can soften text, introduce blockiness, and make fine details less readable.
Build the CTA into the edit
The final frame and caption should tell viewers what happens next. If the full video is in your bio, say that directly. If you're using a Story sticker, publish the Story close to the Reel and use matching language so the viewer doesn't have to search.
A teaser should create a clear information gap, not withhold the entire point. Give viewers a useful takeaway, then offer the YouTube video for the deeper demonstration, full process, or supporting detail.
You can speed up clipping, captioning, and formatting with Hooked's YouTube link-to-video feature, but review the first frame, crop, caption accuracy, and music before export. The tool can reduce repetitive editing work, while the final judgment still belongs with the creator who understands the audience and rights.
Troubleshooting Common Issues When Sharing Fails
Most failed shares have a visible symptom and a narrow fix. Diagnose the format before changing the whole workflow.
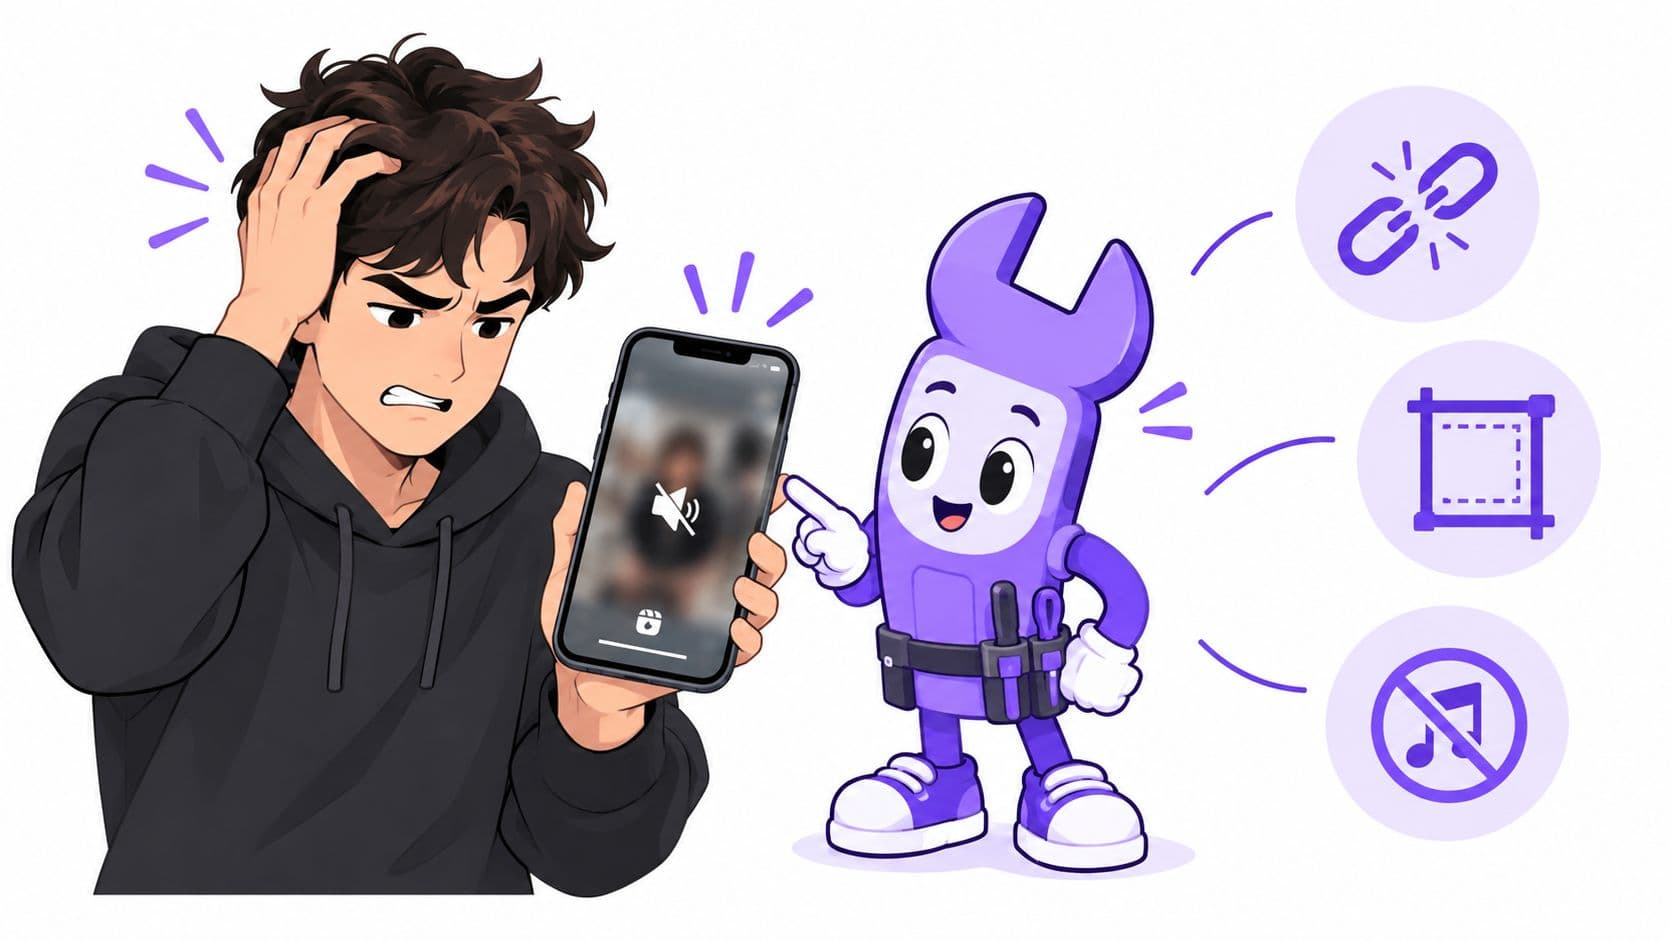
The link sticker is missing or won't work
Update Instagram, restart the app, and check whether the account has restrictions in Account Status. If the URL is rejected, test the plain YouTube address in a phone browser and remove unnecessary redirect parameters while troubleshooting.
A link that opens correctly in the browser can still feel disappointing if the Story promise doesn't match the landing page. Make the sticker language and YouTube title consistent so viewers know they've reached the right video.
The Reel looks blurry or cropped
Blurry output usually comes from a low-quality source, repeated compression, an unsuitable codec, or an export that was resized poorly. Start with the original master, export once using the Reel settings above, and upload that file rather than a screen recording.
Cropping problems usually begin in the edit. Reopen the vertical project, inspect faces and text near the edges, and preview the cover in both the Reel view and profile grid before publishing. A raw horizontal reupload may be fast, but it forces Instagram to solve a framing problem your editor should have solved first.
The audio is muted or out of sync
Muted audio often points to music rights or a mismatch between the YouTube license and Instagram use. Replace uncleared music, preserve dialogue where you have the right to use it, and test the full export before publishing.
For sync issues, render a single flattened file at a constant frame rate. Multiple clips with variable frame rates can drift after upload, even when they played correctly inside the editor.
The upload stalls
Check the connection, close competing apps, and try a fresh export if the file repeatedly fails. An unusually large or oddly encoded file is more likely to create trouble than a standard platform-ready export.
Smarter Repurposing Tips to Grow on Both Platforms
Treat Instagram as the trailer environment and YouTube as the deeper viewing destination. A useful Reel can answer one question completely while still making the longer video attractive to people who want the full method, context, or demonstration.
Create several possible hooks while editing the YouTube original. Test different openings, captions, and cover treatments as separate Instagram assets, but keep the promise accurate. If a Reel earns attention without producing meaningful YouTube interest, the handoff may be too vague or the long-form video may not deliver what the teaser suggested.
The strongest share is often a native teaser, not a duplicate upload.
A simple decision rule keeps the workflow efficient:
- Need a click now: Use a Story link sticker.
- Need ongoing access: Put the YouTube destination in your bio.
- Need discovery: Cut a vertical Reel with captions and a clear payoff.
- Need a personal recommendation: Send the link by DM with context.
- Don't own the footage: Link to the original instead of rehosting it.
Batching helps you maintain consistency. Prepare the YouTube link, select several potential moments, create vertical versions, and schedule the approved assets across your channels. Track which topics and hooks attract meaningful interest, then use those patterns to shape future YouTube openings.
Hooked can help creators turn YouTube source material into platform-ready vertical clips with AI-assisted moment selection, captions, formatting, and scheduling across social channels. Visit Hooked to prepare your next YouTube-to-Instagram repurposing workflow, then review every export for rights, framing, and the promise made to viewers.